Standing at 6,962 meters, Aconcagua commands respect. As the highest peak in both the Western and Southern Hemispheres, this Argentinian giant has humbled countless experienced mountaineers while rewarding the well-prepared with one of climbing’s most coveted summits.
I’ve personally guided dozens of expeditions up Aconcagua’s slopes, and I can tell you with certainty: there’s no shortcut to the summit. But there is a proven pathway—one built on systematic training, strategic acclimatization, mental resilience, and technical competency.
This isn’t a casual trekking peak. Aconcagua demands serious preparation. If you’re ready to commit to the process, this guide will show you exactly how to prepare your body, mind, and skillset for the Western Hemisphere’s ultimate mountaineering challenge.
Understanding What You’re Up Against
Before diving into training protocols, let’s establish what climbing Aconcagua actually entails.
The standard route via Plaza de Mulas spans 19 days, including approach, acclimatization rotations, multiple high camps, and summit push. You’ll be living above 4,000 meters for over a week, with several days spent above 5,000 meters where your body begins deteriorating faster than it can recover.
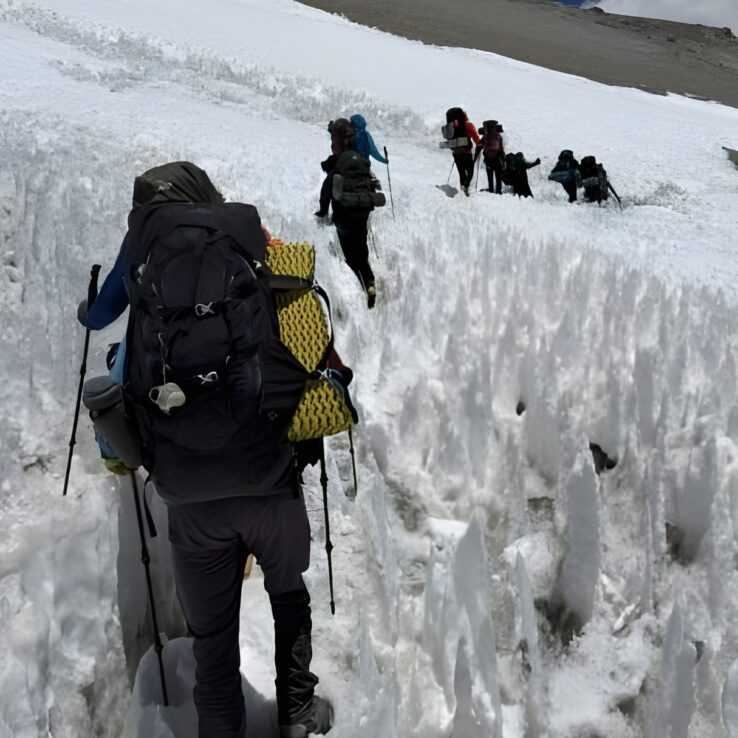
Summit day involves a 1,062-meter elevation gain from Camp 3 (5,900m) to the summit (6,962m), typically taking 6-8 hours of climbing in thin air where oxygen levels drop to roughly 40% of sea level. The final push includes the notorious Canaleta—a steep scree gully that tests every ounce of physical and mental strength you’ve built.
Weather conditions are notoriously harsh. Winds regularly exceed 100 kilometers per hour. Temperatures can plummet to -40°C with wind chill. These aren’t occasional extremes—they’re routine conditions that define the Aconcagua experience.
Understanding this reality is the first step in proper preparation. Now let’s break down exactly how to train for it.
Physical Training: Building Your Aerobic Foundation
Your cardiovascular system is the engine that will carry you to 6,962 meters. Without a strong aerobic base, no amount of mental toughness or technical skill will compensate for a body that can’t deliver oxygen efficiently to working muscles.
The 12-Week Training Protocol
Our structured training program spans 12 weeks minimum, progressively building the endurance and strength required for multi-day high-altitude climbing. This isn’t optional—it’s the baseline preparation needed to have a realistic summit chance.
Weeks 1-4: Building the Foundation
Start with 30-minute Zone 2 runs (conversational pace where you can speak in full sentences) on Mondays. Add strength training sessions on Tuesdays focusing on leg strength, core stability, and functional movement patterns. Wednesdays introduce hill repeats—short, steep climbs of 100 meters repeated 6 times to build power and simulate steep mountain terrain.
Long walks of 1+ hours on Thursdays develop the steady, sustained effort you’ll need on summit day. Fridays incorporate high-intensity interval training (HIIT): 10 rounds of 1-minute Zone 4 effort (hard breathing, can only speak short phrases) alternating with 1-minute Zone 2 recovery.
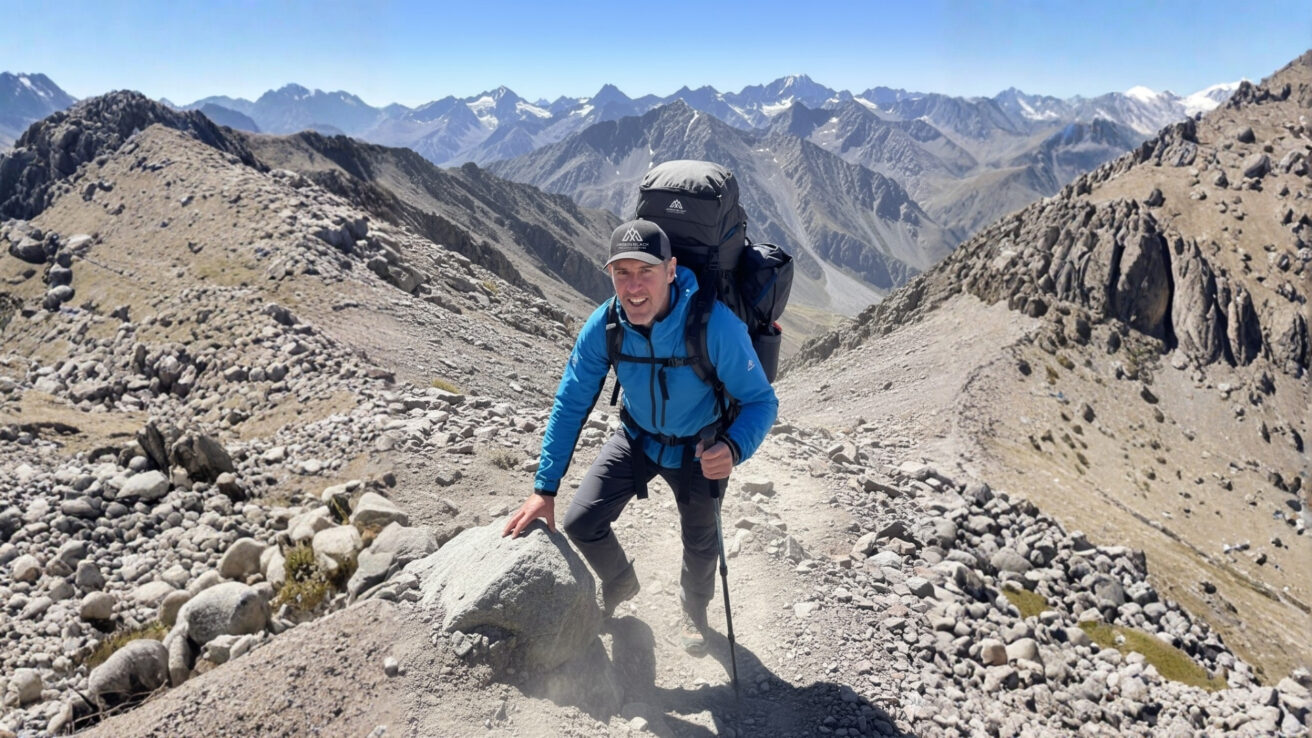
Weekends are crucial. Get out on real mountains. Complete 6-8 hour treks carrying weight in your backpack. Start with 8kg and progressively increase to 12kg by week 12. This weekend mountain time is non-negotiable—it builds the specific endurance that gym training can’t replicate.
Weeks 5-8: Increasing Intensity
Progress your Zone 2 runs to 35-40 minutes. Hill repeats extend to 150-200 meters for 7-8 repetitions. HIIT sessions increase to 12 rounds with longer Zone 4 intervals (90 seconds). Add speed work on flat terrain: 4 x 400-meter repeats and 2 x 800-meter repeats to build anaerobic capacity.
Continue weekend mountain treks, but now string together consecutive days. Complete back-to-back 6-8 hour treks to simulate the expedition’s cumulative fatigue. This teaches your body—and critically, your mind—what sustained effort over multiple days feels like.
Weeks 9-12: Peak Training
Final weeks push to 45-minute Zone 2 runs, 10 hill repeats of 200 meters, and maintain the strength, HIIT, and weekend mountain protocols. By week 12, you should be comfortable completing 8-hour mountain days with 12kg pack, back-to-back on consecutive days, at a steady sustainable pace.
The Critical Weight-Bearing Component
Notice the emphasis on gradually increasing pack weight to 12kg. This isn’t arbitrary. Above base camp on Aconcagua, you’ll carry your personal gear, water (3+ liters), food, and clothing layers. The combined weight tests your legs, core, and cardiovascular system simultaneously.
Train with weight. Start light (5-6kg) and systematically increase. Your legs need to adapt to sustained uphill walking under load. The micro-damage and adaptation that occurs during weighted training is what builds the muscular endurance required for summit day.
Why Zone 2 Training Matters at Altitude
Zone 2 training—that conversational pace that feels almost too easy—develops your aerobic engine more effectively than harder efforts for high-altitude climbing. At extreme altitude, you can’t maintain high-intensity efforts. Success comes from sustaining moderate effort for hours.
Zone 2 training increases mitochondrial density, improves fat oxidation, enhances capillary networks, and builds the slow-twitch muscle fibers that power endurance activities. These adaptations directly translate to better performance in the oxygen-depleted environment above 6,000 meters.
Acclimatization: The Make-or-Break Factor
Physical fitness gets you to base camp. Proper acclimatization gets you to the summit.
Aconcagua’s altitude cannot be overcome by fitness alone. The human body requires time to adapt to reduced oxygen levels, and rushing this process causes altitude sickness that ends summit attempts or, in severe cases, threatens lives.
How Our Itinerary Supports Acclimatization
The 19-day expedition deliberately builds acclimatization through strategic climbs and descents. After reaching base camp at Plaza de Mulas (4,260m), you don’t immediately push higher. Day 6 includes an acclimatization climb to Mt. Bonete summit at 5,091 meters—reaching altitude then returning to base camp to sleep.
This “climb high, sleep low” strategy triggers acclimatization mechanisms without forcing your body to sleep at elevations it’s not adapted for. You’ll make multiple carries to higher camps, spending time at altitude during the day but returning to sleep at lower elevation where recovery is better.
Days 9-10 at Camp 2 (5,250m) are designated active rest days. This isn’t laziness—it’s strategic adaptation. Your body needs time at this elevation to produce more red blood cells, adjust breathing patterns, and adapt metabolically to sustained hypoxia.
Day 11 involves another acclimatization rotation: climb to Camp 3 (5,900m), drop supplies, then return to Camp 2 to sleep. Only after this careful progression do you move up to Camp 3 for the summit push.
The Hydration Factor
Staying well-hydrated is monumentally important for acclimatization. At altitude, you lose water through increased respiration (that heavy breathing in thin air), lower humidity, and increased urination as your body adjusts.
We encourage drinking 3-5 liters daily. Yes, that sounds like a lot. Yes, it means frequent urination including nighttime trips outside your tent in sub-zero temperatures. Yes, it’s absolutely essential.
Dehydration thickens blood, reducing oxygen transport efficiency and increasing altitude sickness risk. The color of your urine is a simple indicator: pale yellow means adequately hydrated; dark yellow or amber signals dehydration requiring immediate correction.
The Diamox Discussion
Many climbers use acetazolamide (Diamox) to aid acclimatization. This medication forces your kidneys to excrete bicarbonate, acidifying your blood and stimulating breathing. The increased respiration improves oxygen saturation.
Diamox doesn’t prevent altitude sickness, but it can reduce symptom severity and speed acclimatization. Typical dosing is 125-250mg twice daily, starting 1-2 days before altitude exposure.
Side effects include tingling fingers and toes, altered taste (carbonated beverages taste flat), and increased urination. Discuss Diamox with your doctor during trip planning, and if prescribed, test it before the expedition to ensure you tolerate it well.
Recognizing Altitude Sickness
Acute Mountain Sickness (AMS) symptoms include headache, nausea, loss of appetite, fatigue, dizziness, and sleep disturbances. Mild symptoms are common and usually resolve with rest and hydration.
Severe symptoms—vomiting, severe headache unrelieved by medication, confusion, difficulty walking, shortness of breath at rest—indicate progression toward potentially fatal High Altitude Pulmonary Edema (HAPE) or High Altitude Cerebral Edema (HACE).
The treatment for severe altitude sickness is immediate descent. No summit is worth your life. As expedition leader, I maintain absolute authority to require descent if altitude sickness threatens a climber’s safety. This isn’t negotiable.
Mental Preparation: Training Your Mind for Altitude
Physical training prepares your body. Mental preparation determines whether you’ll use that physical capacity when conditions get brutal.
Understanding the Mental Challenge
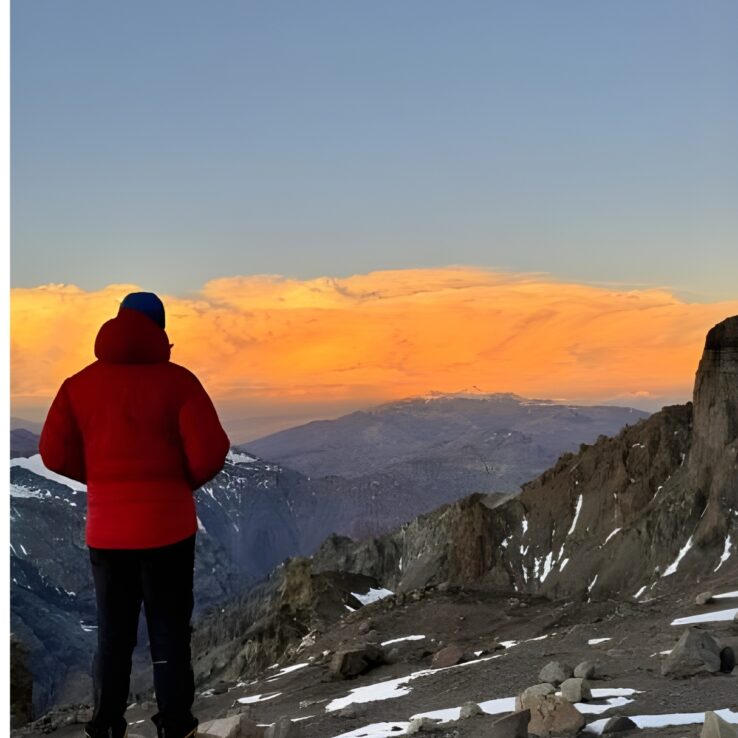
Summit day on Aconcagua tests mental fortitude more than physical strength. You’ll wake at 2-3 AM after fitful sleep at 5,900 meters. The temperature will be deeply cold. Your body will feel exhausted before you even start climbing.
For the next 6-8 hours, you’ll grind upward through increasingly thin air where every step requires deliberate effort. The summit never seems to get closer. Doubt will creep in. Your brain, oxygen-deprived and exhausted, will generate compelling arguments for turning around.
This is where mental preparation becomes the determining factor between summit and retreat.
Building Mental Resilience Through Training
Mental toughness isn’t innate—it’s trained. During your 12-week preparation, actively practice mental skills:
Embrace Discomfort: Deliberately train in adverse conditions. Hike in rain. Run when tired. Continue when you’d prefer to stop. These experiences normalize discomfort and teach your brain that suffering is temporary and manageable.
Practice Segmentation: On long training hikes, break the route into micro-goals. Don’t think about the trailhead 6 hours away—focus on reaching the next landmark 10 minutes ahead. This cognitive strategy prevents overwhelm and builds the mental approach you’ll use during summit push.
Develop Your Mantra: Create a personal phrase that grounds you during difficult moments. Mine is “one step, one breath.” It sounds simple, but repeated thousands of times during an 8-hour summit push, it becomes a powerful tool that overrides negative self-talk.
Visualization: Spend 10 minutes before sleep visualizing the next day’s climb. See yourself moving steadily, breathing rhythmically, reaching the summit. Mental rehearsal primes your brain for success and reduces anxiety about the unknown.
Preparing for Extended Camping at Altitude
Mental preparation also means accepting the realities of high-altitude camping for extended periods. You’ll spend nights in cold tents where sleep is fitful. Temperatures inside tents can drop well below freezing. Simple tasks like putting on boots or preparing food require significant effort.
This isn’t comfortable. It’s not meant to be. Understanding and accepting this reality before the expedition prevents the psychological shock that derails unprepared climbers when they discover that base camp isn’t a luxury lodge and high camps are survivalist affairs.
Technical Skills: What You Actually Need
Aconcagua’s standard route doesn’t require advanced technical climbing, but calling it “non-technical” creates dangerous misconceptions about the skills needed.
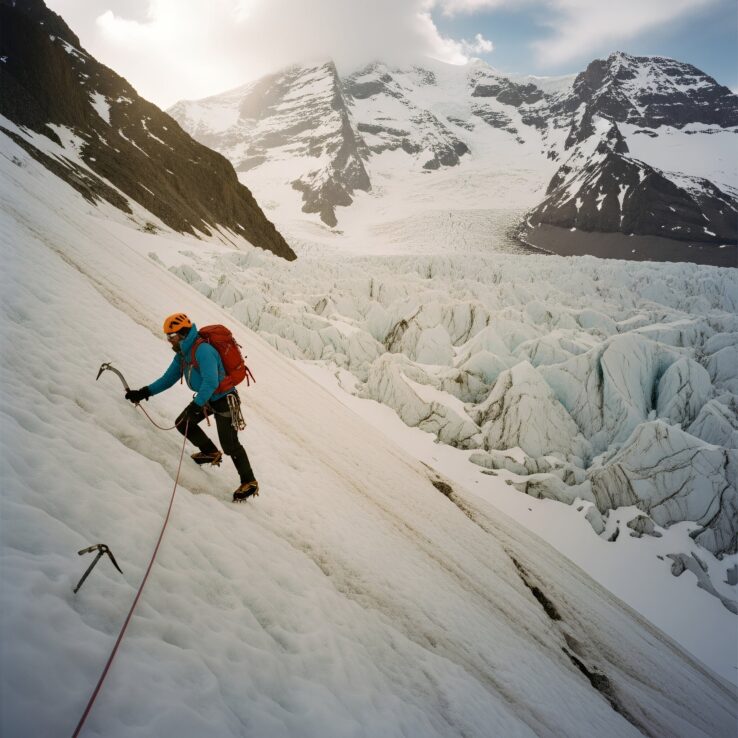
Ice Axe and Crampon Proficiency
While the standard route may not always require ice axes and crampons, you must know how to use them competently. Early season conditions, particularly on summit day, can present snow and ice requiring this equipment.
More importantly, the Polish Glacier traverse route explicitly requires ice axes (bring two), crampons, and rope skills while crossing technical terrain at extreme altitude. Even if you’re planning the standard route, having technical competency provides options if conditions require it.
Before the expedition, complete a basic mountaineering course covering:
- Proper crampon fitting and walking techniques (flat-footing, French technique, front-pointing)
- Ice axe self-arrest from various fall positions
- Snow anchors and rope work for steep snow terrain
- Movement efficiency on steep terrain while wearing full high-altitude gear
Understanding Rope Work
Our requirement for “good understanding of rope work ascending and descending” signals broader mountaineering competency. Even without roped climbing sections, understanding rope systems, anchor principles, and emergency protocols indicates you’ve spent time in serious mountain environments.
This experience translates to better decision-making, risk assessment, and situational awareness—skills that matter enormously when exhausted and oxygen-deprived at 6,500 meters.
Movement Efficiency at Altitude
Technical proficiency also includes efficient movement. At high altitude, wasted motion depletes precious energy. Experienced climbers move with deliberate efficiency: pressure breathing on each step, rest-step technique on steep sections, steady sustainable pace without surging.
These skills only develop through experience. If you haven’t climbed above 5,000 meters previously, you lack the experiential knowledge of how your body moves and functions in severe hypoxia. This is why we require previous high-altitude experience—Aconcagua isn’t the place to learn altitude management.
Essential Gear: What You’ll Actually Need
Proper equipment isn’t optional at 7,000 meters. The difference between adequate and inadequate gear can determine summit success or create life-threatening situations.
The Critical Items
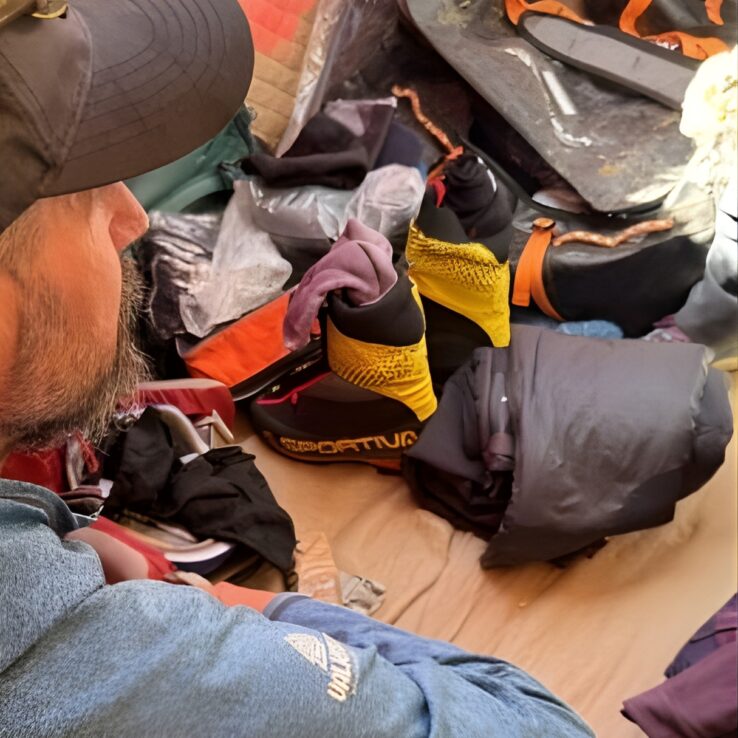
Double-Skin Mountaineering Boots (7,000m rated): Your boots are the most important gear decision. They must provide thermal protection to -40°C while remaining comfortable for 8-hour summit days. Brands like La Sportiva, Kailas, and Millet make excellent options. Get properly fitted months before the expedition and break them in during training.
-30°C Sleeping Bag: Nights at Camp 3 (5,900m) are brutally cold. A sleeping bag rated to -30°C is minimum. Consider a -40°C bag if you sleep cold. Down fill offers better warmth-to-weight ratio, but ensure it stays dry—wet down loses insulating properties.
800g+ Goose Down Jacket: Your high-altitude puffer jacket provides critical insulation during summit push and in camp. Don’t skimp here. An 800+ gram fill weight jacket with hood is essential.
Layering System: Build a complete layering system including merino wool base layers (4 sets—you’ll be wearing them for days), technical fleece mid-layers, insulated pants, hard shell jacket and pants (waterproof, windproof, breathable), and a lighter insulated jacket for lower camps.
7,000m Expedition Mitts: Your hands are vulnerable to frostbite. Bring liner gloves, insulated guide gloves, and expedition-grade mitts rated for extreme cold.
Headlamps: Bring two 500-700 lumen headlamps with extra batteries. Summit push starts in darkness, and headlamp failure at 6,500 meters creates serious problems.
Ice Axes and Crampons: Two ice axes and properly fitted crampons compatible with your mountaineering boots. Don’t wait until Mendoza to sort this out.
The Complete Packing List
Beyond the critical items, you’ll need comprehensive gear covering sleeping equipment (inflatable and closed-cell foam pads, earplugs, pillow), multiple water bottles and thermos, pee bottle, eating utensils, medical supplies (personal first aid, Diamox, altitude medications, blister treatment), toiletries, sunscreen (SPF 50), lip protection, and personal snacks to supplement expedition meals.
The complete packing list in our expedition materials covers every item in detail. Study it months in advance, acquire gear systematically, and test everything during training hikes. Click below to see the complete Packing list for Aconcagua
The Climbing Permit and Logistics
Aconcagua requires an official climbing permit from Mendoza Provincial Park. Costs range from $550-$950 depending on season and route (early bird discounts available March-September, regular rates September onwards).
The permit supports park maintenance, medical services, park rangers, and helicopter rescue operations. It’s non-refundable and valid only for specified dates, so coordinate permit timing with your expedition dates carefully.
You cannot enter the park without proof of travel insurance covering mountaineering to 7,000 meters and helicopter evacuation. Park rangers verify insurance at the gate before allowing entry—this requirement is strictly enforced.
Nutrition and Fueling Strategy
At high altitude, appetite disappears while caloric needs increase dramatically. Your body burns 4,000-6,000 calories daily just maintaining core temperature and basic function, yet eating becomes increasingly difficult above 5,500 meters.
Base Camp Nutrition
Our luxury base camp at Plaza de Mulas provides comprehensive meals prepared by specialized chefs. Breakfasts include coffee, tea, cereals, bread, eggs, meats, and fruits. Lunches and dinners feature soups, Argentine steak, pasta, rice, pizza, and fresh salads with desserts. Vegetarian, vegan, celiac, and lactose-free menus are available with advance notice.
Eat aggressively at base camp. Your body needs fuel for acclimatization and upcoming summit push. Force food even when appetite wanes.
High Camp Strategy
At high camps, guides prepare meals with more limited ingredients. Options focus on carbohydrate-rich foods that digest easily: pasta, rice, soups, and hot drinks. Bring personal snacks you know you can stomach: energy bars, gels, nuts, beef jerky, candy.
Summit day nutrition is critical. Pack high-calorie, easy-to-consume foods: energy gels, bars, trail mix. Eat small amounts frequently rather than large meals. Stay hydrated obsessively—dehydration kills appetite and impairs performance.
The Expedition Itinerary: What to Expect
Understanding the day-by-day progression helps mental preparation and sets realistic expectations.
Days 1-5: Arrival in Mendoza, equipment check, obtaining permits, approach to base camp via Confluencia with acclimatization hike to Plaza Francia (4,000m). These days ease you into altitude and establish base camp at Plaza de Mulas (4,260m).
Days 6-7: Critical acclimatization rotations including summit of Mt. Bonete (5,091m) and first carry to Camp 1 Canadá (4,910m). These push altitude exposure while maintaining base camp as sleeping elevation.
Days 8-10: Move to Camp 2 Nido de Cóndores (5,250m) followed by two active rest days. Your body is working hard to acclimatize even during “rest” days.
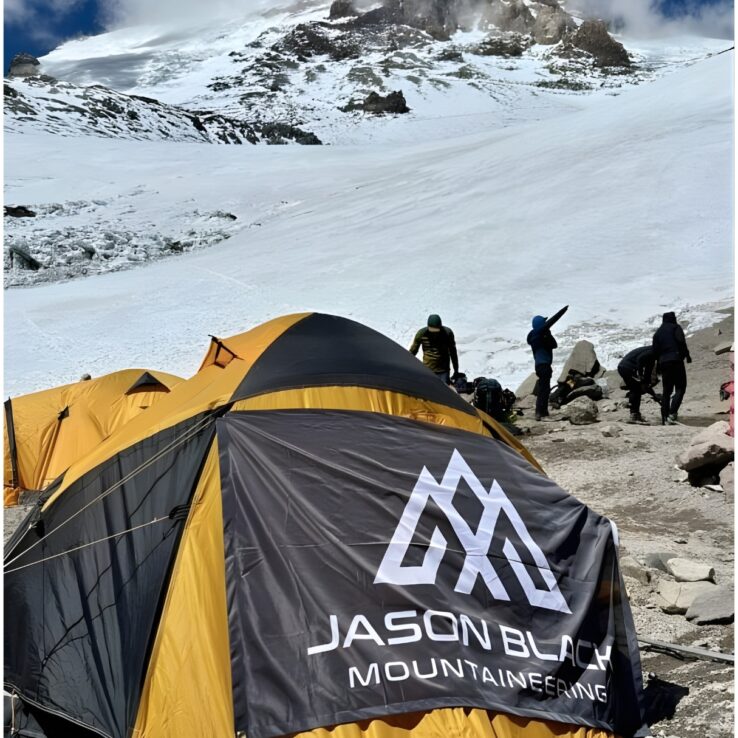
Days 11-12: Carry to Camp 3 Berlín-Cólera (5,900m), then move up to Camp 3 for summit push. Sleep will be poor. Conditions will be harsh. This is expected.
Day 12: Summit day. Climb 1,062 meters to 6,962m, descend to Camp 3. This will be one of the longest, hardest days of your life.
Days 13-15: Descent to base camp, exit to Penitentes, return to Mendoza. The relief of descending to oxygen-rich air is profound.
Contingency Days: Built into the itinerary for weather delays or additional acclimatization needs. Weather determines summit windows, not your schedule.
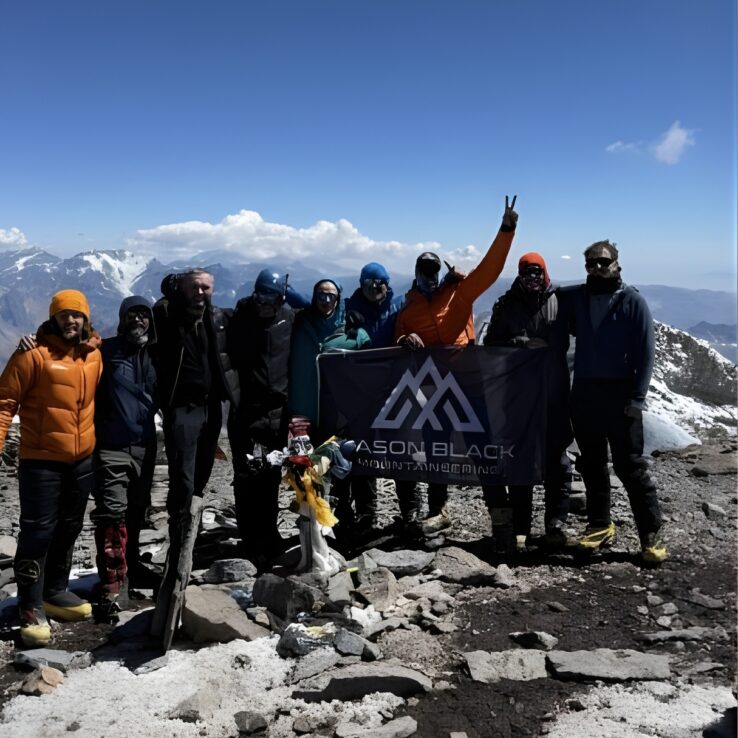
Why Jason Black Mountaineering
Climbing Aconcagua with professional guidance dramatically improves summit success rates while maintaining exceptional safety standards. I personally guide every Aconcagua expedition, bringing decades of high-altitude experience including records for fastest ascents of both Kilimanjaro and an Aconcagua traverse.
Our small group approach (maximum 10 climbers) ensures optimal guide-to-client ratios. You’re not a number in a massive commercial expedition—you’re part of a carefully assembled team where individual attention and safety remain paramount.
Our luxury base camp provides crucial comfort during the challenging acclimatization phase: thermal-insulated dining tents with wooden floors, electricity, heating stoves, specialized cooking staff, and comprehensive meals. Daily weather and avalanche forecasts inform decision-making. Emergency oxygen, satellite communications, and comprehensive rescue protocols ensure safety.
This comprehensive support structure doesn’t make Aconcagua easy—it makes success realistic for well-prepared climbers willing to embrace the challenge.
Final Thoughts: Are You Ready for the Commitment?
Learning how to climb Aconcagua isn’t about discovering a secret shortcut or magic formula. It’s about committing to systematic preparation across physical training, acclimatization strategy, mental resilience, and technical competency.
The 12-week training protocol isn’t negotiable. The previous 5,000m experience requirement isn’t gatekeeping. The gear checklist isn’t optional. The 19-day expedition duration isn’t excessive.
These requirements exist because they’re what Aconcagua demands. The mountain doesn’t negotiate. It doesn’t offer participation trophies. It rewards the prepared and humbles the underprepared, regardless of their confidence, fitness, or determination.
If you’re willing to commit to proper preparation—to embrace the training, invest in appropriate gear, respect the acclimatization process, and accept that summit success is never guaranteed—then Aconcagua offers one of mountaineering’s most rewarding challenges.
The highest peak in the Western Hemisphere is waiting. Now you know exactly how to prepare for it.
Ready to climb Aconcagua?
Join Jason Black for this professionally guided 19-day expedition to the Western Hemisphere’s highest peak. Previous 5,000m+ experience required. Limited spaces available.